
Installing Cisco’s NSO
I’ve been learning Cisco’s NSO – Network Services Orchestrator. NSO is Cisco’s own Orchestration (think Ansible/Chef/Puppet) platform. It’s vendor agnostic too! So, you can manage more than just Cisco devices
In this article I’ll walk you through installing NSO on Ubuntu Linux in a lab for Dev/Test/PoC. This is a local install that allows you to create multiple instances of NSO so you can play with and tweak settings in a development, or lab, environment. So, if you want to follow along go setup a Linux server and come right back!
A more permanent or production installation would require a system install. That allows the NSO application and related services to startup and shutdown with the server. That process is a bit different than the Local Install and is described in the NSO documentation.
More About NSO
NSO is the result of an acquisition that Cisco made of Tail-F Systems. Tail-F Systems/NSO is a NETCONF and YANG Orchestration platform. It was aimed at Service Providers because when Tail-F was first developed those were the only organizations that were demanding automation and orchestration of their networks. Today, however, more than just Service Providers are automating their networks.
As I learned, through watching this video, the big advantage of NSO is that on Day 1 it can pull the existing configuration off of your network devices and from that day forward you can manage and automate your network as it sits. With other platforms, it can take time to develop them so that they are ready to orchestrate your existing network.
Cisco Provides a free edition of NSO that can be used in a Lab/Non-Production environment through Cisco DevNet, which is where we are going to get the copy of NSO from for this article.
The Lab
For this lab I’m running NSO locally on a Ubuntu Linux VM running in VMware Workstation. From here I’ll be able to interact with both virtual devices in GNS3, or CML2, and even real hardware I have in my lab!
For ease, my VM network card is in bridge mode so I can get an IP on my local lan and interact with other servers and devices.
Grab the Installer Files
First we need some installer files. Even though it’s free you’ll need your CCO ID to grab this, so make sure you have those credentials handy.
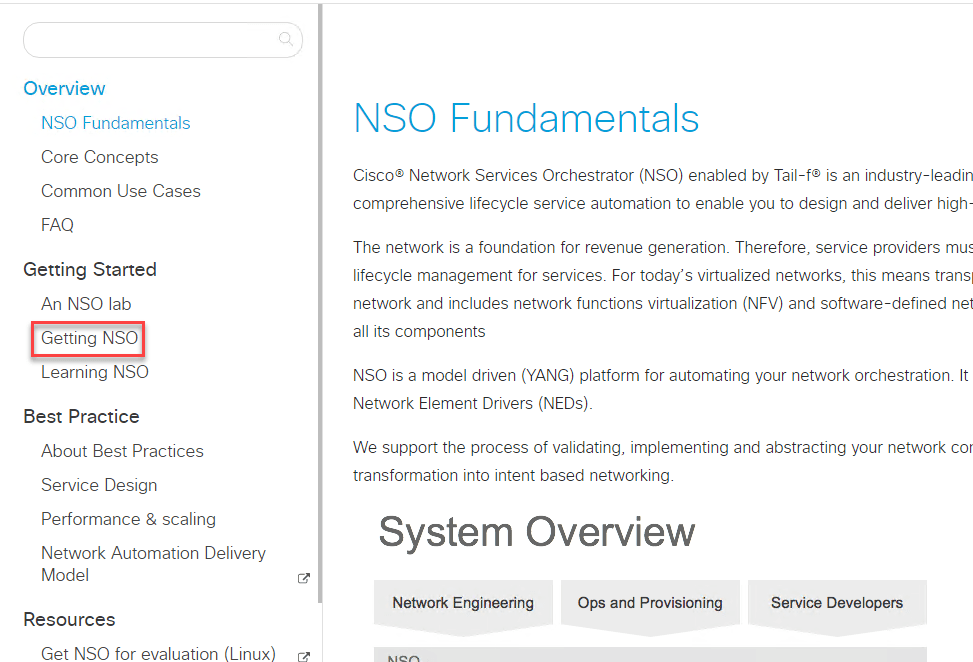
- Head on over to https://developer.cisco.com/docs/nso/
- Click on Getting NSO, under the Getting Started Heading in the nav pane on the left:
3. Then, click Downloads and then NSO 5.3 Linux.
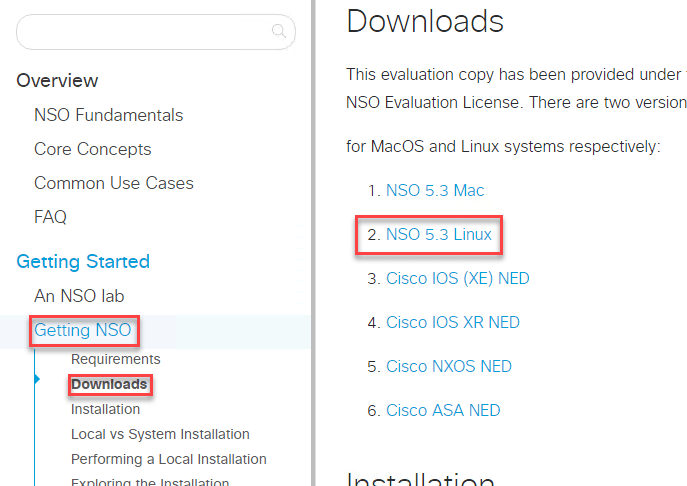
4. You’ll be prompted to login here, so go ahead and click Login with CISCO and then enter your credentials.
Transferring to Linux
So, I’m using the server version of Ubuntu, so there’s no GUI. I fought an issue where when I tried to unpack the files on my server I kept getting fatal errors relating to file integrity. I transferred the file first by TFTP, then SCP – but still got the same error. Ultimately it was SFTP for the win!
For a quick SFTP server from Windows I used the Solar Winds SFTP Server. Once you download the file, install it, and run it. Open the settings window by double clicking the icon in the Windows tray.
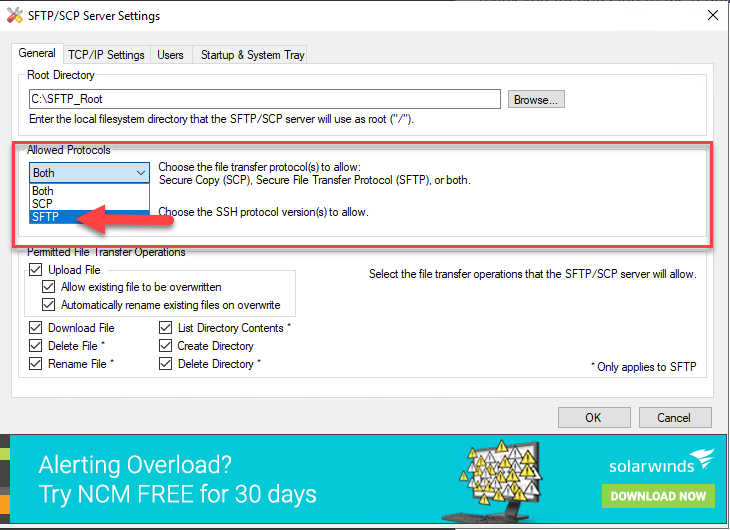
With settings opened, under Allowed Protocols change the first drop down from Both to SFTP.
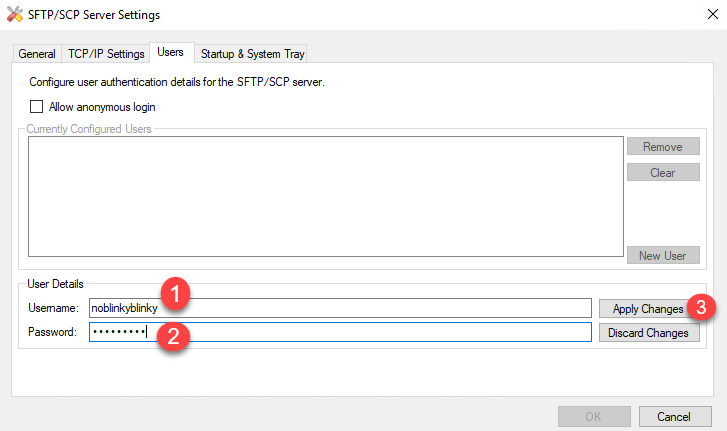
Now, we have to add a user or allow anonymous login. I just added a new user by clicking the Users tab and then the New User button.

Then just enter in a username and password for the user and click apply changes.
The SolarWinds SFTP/SCP server creates a folder on the root of C: called SFTP_Root. Grab the file you downloaded earlier and place it in that folder. Next we’ll copy the file over to the Ubuntu Server from the server itself.
SFTP the NSO Installer
So, I have a bare bones clean install of Ubuntu Server 20.04. The first thing I want to do is create a folder to catch the download of the file into, I’m just going to call it downloads. Then I’ll move into that directory before I connect to my SFTP server.
mkdir downloads
cd downloads
Then, I’ll enter the sftp client using the command sftp followed by the username@ip-of-the-server. Hit enter and you’ll get prompted for the password. Enter the password and hit enter again and now you should be dropped into an SFTP prompt.
Now I’ll use the GET command and the file name to grab the file. While the file is transfering it should give you some feedback on it’s progress. If you’re having issues make sure there is either an allow rule in the windows firewall or you just turn that pesky thing off – in your lab environment of course.

To verify, I used the ls command and I can see the file is now in the downloads folder. Let’s go install NSO!
Installing NSO
Before we can jump right to the install of NSO there’s a few pre-requisites we should grab first. Python 3 is already installed so I’m good there. I also like Tree for visualizing folder structures from the CLI.
- Java – Java runtime environment
- Ant – Web server
- Pip – Python Installer
- Paramiko – Python implementation of SSHv2 commonly used to access network devices using python scripts.
- Tree – a small app to visualize folder/file structures in bash.
The commands to do this are:
sudo apt-get install default-jdk
sudo apt-get install ant
sudo apt-get install python3-pip
pip3 install paramiko
sudo apt-get install tree
Okay, now for the main event!
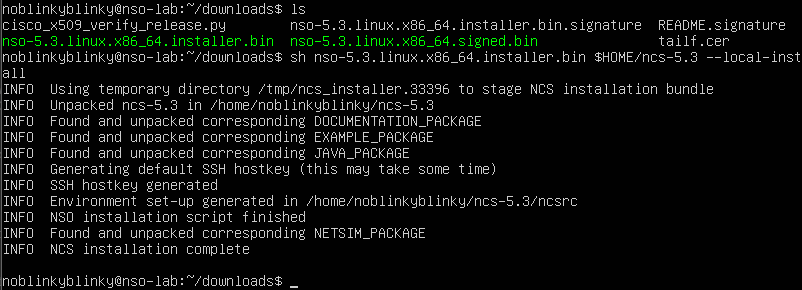
First we’ll sh the file that we downloaded. Think of sh as “WinZip,” it’ll unpack that bin file. Add the switch –skip-verification – this skips verification of the signed file. If you don’t signature verification fails anyway, referencing needing Python 2 or higher. Skipping makes it much easier.
sh nso-5.3.linux.x86_64.signed.bin --skip-verificationNow you can do an ls and verify the file has been unpacked. You should see a file with installer.bin in the name. Next we do the install, specifying a new folder that will get created where the NSO files will live. Here you can name the folder anything, maybe a project you want to work on. You can do as many installs as you need and have multiple dev instances running on the same box, just not all at once.
sh nso-5.3.linux.x86_64.installer.bin $HOME/ncs-5.3 --local-install
Now we’ll finish setting up the environment in the appropriate folder structures:
source $HOME/ncs-5.3/ncsrc
ncs-setup --dest $HOME/ncs-run

Now we can start NCS. After some trial and error, and with some help from a co-worker, I found you must do this from within the ncs-run folder. So, cd out of downloads and into ncs-run
~/downloads$ cd ..
~$ ls
downloads  ncs-5.3  ncs-run
~$ cd ncs-run
~/ncs-run$
Now we can start NSO by typing ncs – it’s that simple.
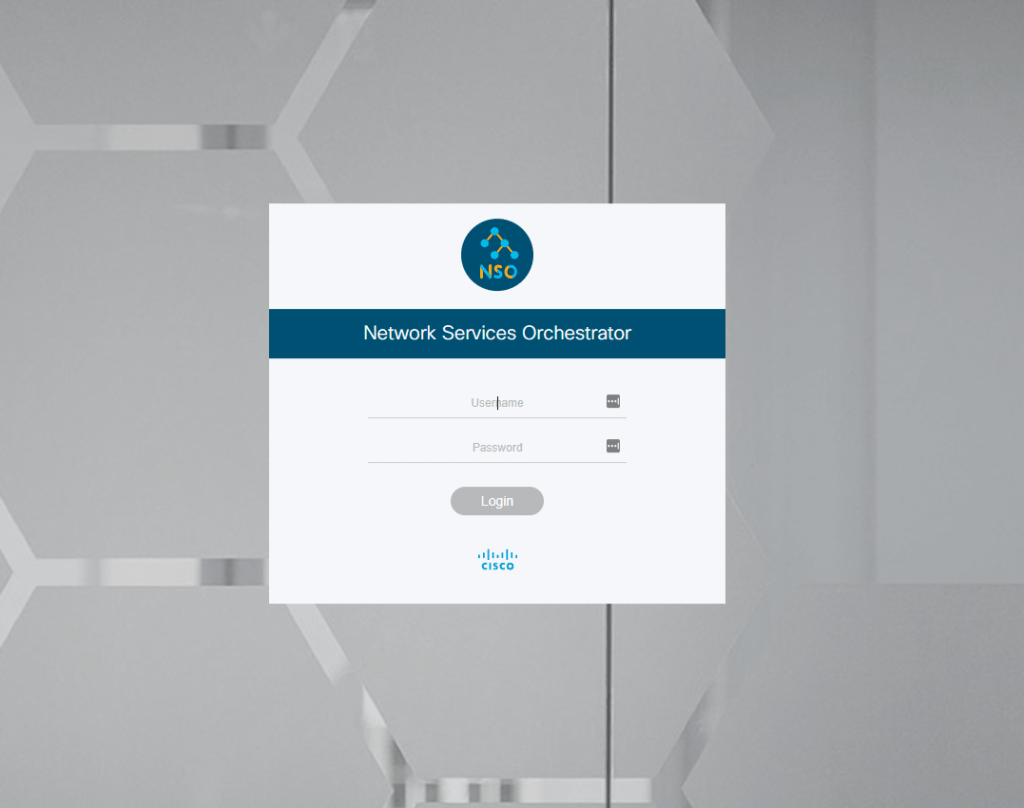
Now, as long as everything started up without issue, and it should presuming you installed the pre-reqs, we can now go visit the site http://server-ip:8080/login.html. Login with the credentials admin/admin.
If you’re not sure what your system IP is you can use ip addr show on the command line to view your current IP.
Side note: Previous Linux versions used to have this handy util called ifconfig, it’s just like the Windows ipconfig command util, that you can use to view IP/MAC and other info on the box. In this latest version of Linux it’s been removed. You can add it back with sudo apt install net-tools. Then type ifconfig to see the IP address of the server.
That’s it!
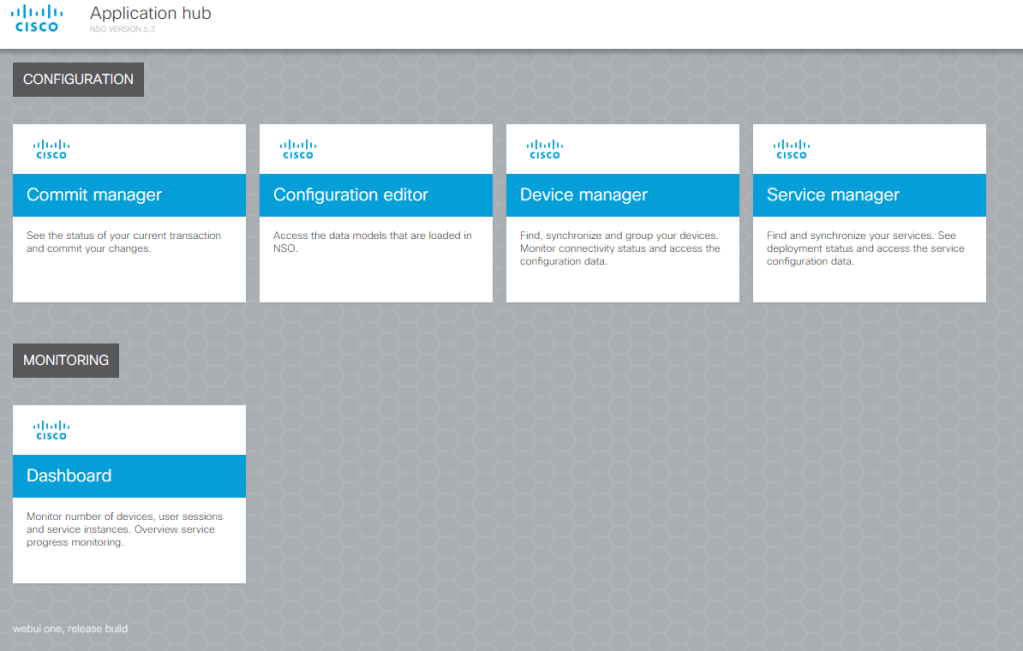
Now you’ve got NSO installed and can begin learning and playing to your heart’s content! In a future blog article I’ll go over adding devices and pulling configuration using NSO.

Great post!
Just a small point about the last side note: instead of re-installing net-tools to use ifconfig, you can type: ip -br a
To see the IP address of your server.
Cheers,
Jerome
LikeLiked by 1 person
It really helped me, Thanks a lot
LikeLike
How can I download freetrial without Cisco ID credentials.
Because when I click “NSO for Linux and MacOS (Darwin) including NED examples” link faced with Forbidden error.
“An error occurred. Please contact your System Administrator.”
LikeLike