
I’ve been a long time Mac user but only recently have I started using a Mac for work. I recently had to connect to a Cisco switch to do some config work and found myself pausing for a sec because for the first time in my career I didn’t have access to Putty and was temporarily stumped as to how I should connect to the console from my MacBook Pro.
The first problem to solve was the physical connection. The 2017 MacBook Pros only have USB C ports. This was pretty easy because most modern laptops don’t have serial ports and haven’t for a longtime, so I already knew what to do. Enter the Keyspan USB serial adapter from Tripp Lite. This wasn’t new for me as I have used and trusted this device for years. I went through many other serial adapters before finding the Keyspan and I have trusted it ever since the day I got it.

The only problem is that the Keyspan comes with a USB-A to USB-B cable. Since the MacBook lacks the necessary ports I had two options:
Option 1: Get a dongle to go from USB-A to USB-C. I had tried several different dongles I had access to at the office. Some worked some of the time and some didn’t work at all. I did some searching on Amazon and came across this 2-pack of Rankie USB adapters that had rave reviews. I can tell you they live up to the hype and they work great, every time! They also work really well for my Yubico Yubikey 4.Option 2: Get a USB A to USB C cable. The MacBook Pro is also, not so lovingly, called the “dongle book” for all of the dongles you need to connect to it. If you don’t want to deal with another dongle you can always get a USB A to USB C cable. This CableCreations is Amazon’s choice for only $6.65.
Next, the software. If you love Putty on Windows you’ll be sad to know that Putty hasn’t been ported to the Mac yet. I hope someone is working on that, however, in the mean time you can use the native Terminal app and a little application called “Screen” that’s found in just about every version of Linux/Unix.


First, plug in your Keyspan to your MacBook using the cords or dongles. Plug the other end of the roll over cable to the console port.
Next, pop open a Terminal window and run the following command:
ls /dev/
This will list all of the connections and their names. You’ll need to locate the drive for your Keyspan adapter and use it in the next command that calls on Screen. Here is the output when I run the command on my Mac.
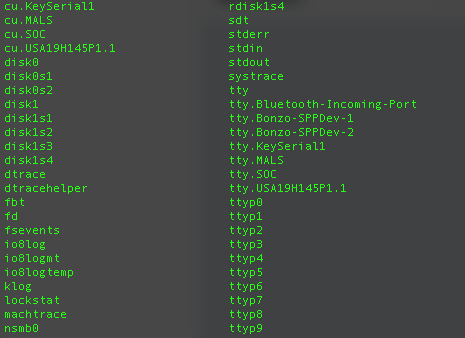
As you can see about half way down there’s a device called tty.USA19H145P1.1. The USA-19HS is the model number of the Keyspan, so I know its the device I’m looking for.
Next, using that string of text launch screen by type “screen” then the directory and name of the Keyspan. Note that you can use tabbed completion after you type enough unique characters. So, I can usually type in “screen /dev/tty.US” and then hit tab to auto complete the selection. Then enter the baud rate for the connection. For most console connections you can 9600, but check your manufacturer documentation first.
screen /dev/tty.USA19H145P1.1 9600
Then hit enter and you’ll enter your console session.
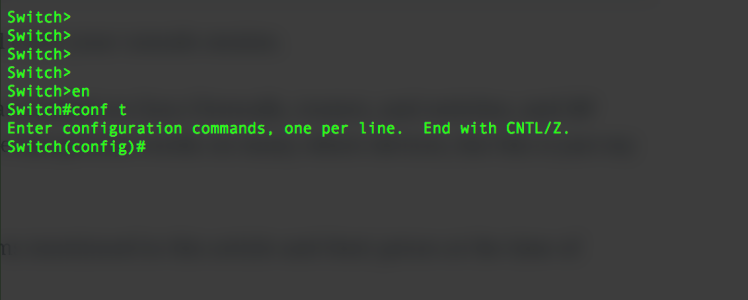
In my experience this has worked on Cisco Firewalls, routers, and switches, and HP switches as well. I’m sure this process works on many others devices, but this is just my personal experience.

Here are links to the items mentioned in this article and their prices at the time of writing.
Tripp Lite Keyspan High-Speed USB to Serial Adapter, PC & Mac (USA-19HS) – $24.99
CableCreation 6.6ft Type C to USB 2.0 B Male Printer Cable Compatible MacBook Pro, HP, Canon, Brother, Epson, Dell, Samsung Printers etc, 2M/ Black – $6.99
Rankie 2-Pack USB C Adapter Hi-speed USB Type C to USB-A 3.0, Black – $6.65

International services this process works on many others devices .
LikeLike
I’ve been using this cable for the past three years. https://www.amazon.com/OIKWAN-Essential-Accessory-Ubiquity-Switches/dp/B0774JV2QQ/ref=sr_1_1_sspa?crid=1K6J905AEUL1A&keywords=USB-C+Console+Cable&qid=1688251728&sprefix=usb-c+console+cable%2Caps%2C846&sr=8-1-spons&sp_csd=d2lkZ2V0TmFtZT1zcF9hdGY&psc=1
With “screen /dev/tty.usbserial* 9600,cs8” which makes it so it doesnt matter which port I plug it into.
LikeLike
Bit late now, but check out Tabby. Damn fine program that’s on most platforms!
LikeLike