
In this article we’ll go over how to upgrade your Spine and Leaf switches to a newer version of the Nexus 9K ACI Code.
In an upgrade scenario you’ll upgrade your APICs first and then your switches. In this environment I’ve already upgraded my APICs. Don’t worry – I’ll do it again so I can write another article!
In a downgrade scenario you’ll downgrade your switches first and then downgrade your APICs. Why down grade? Well, the new APICs ship with the latest and greatest. If you’re comfortable running brand new code in a production environment, go for it! However, you may also want to consider downgrading to a known stable release.
Regardless of your path make sure you consult the APIC Upgrade/Downgrade Support Matrix first! You may find your APIC doesn’t support downgrading to older versions.
The Lab
First let’s take a look at this lab topology so you know what I’m working with:
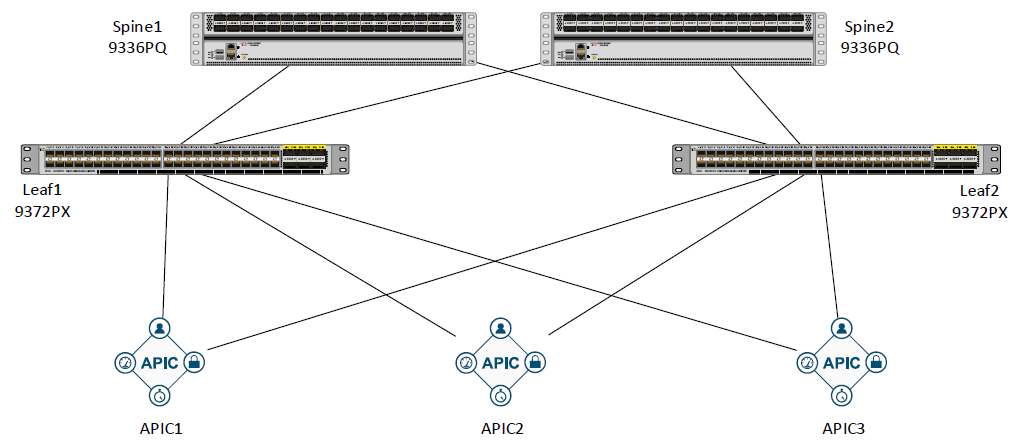
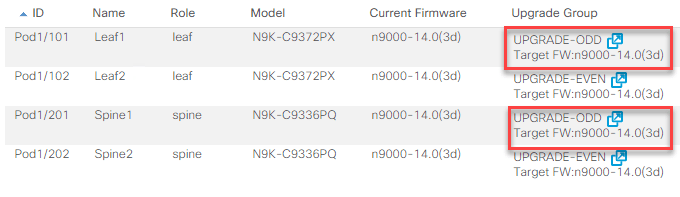
This lab contains two Cisco Nexus 9336PQ Spine switches, two Cisco Nexus 9372PX Leaf switches, and 3 APIC controllers.
If you know what version of the APIC software you’re moving to/running on then identifying the ACI Code software for your Spine and Leaf switches is relatively easy.
Grabbing your ACI Code Switch Software
In order to download this software you’ll need a CCOID that’s tied to appropriate support contracts for your Spine and Leaf switches. Assuming you have that:
First, go to Cisco.com > Software and Downloads.
Then, search for APIC – then click on Application Policy Infrastructure Controller (APIC)

Next, click APIC software.

Now, click on the version of ACI you’re moving to/running on. In this example we’ve already upgraded the APICs to 4.0(3d) so that’s where we’ll go.

On the right hand side of the screen scroll down and under “Related Software” you’ll see ACI Mode Switch Software Release. This is the switch software that matches the APIC software version.
Download the ACI Code and save it where you can easily get to it later.

Upgrading the Switches from the APIC
- Now that you’ve downloaded the desired switch software log back into your APIC and then go to Admin > Firmware.

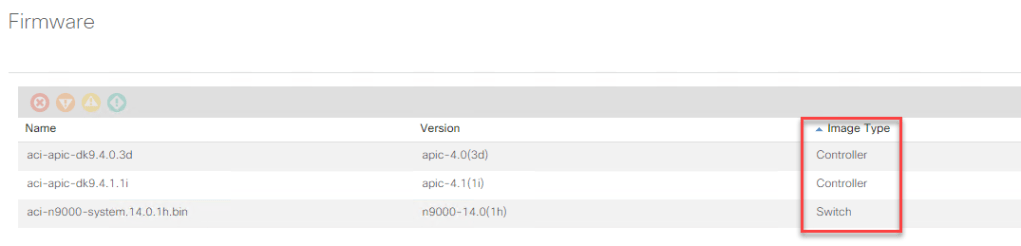
2. Once in the Firmware pane click on images along the top.

Here you’ll see all of the images for both controllers and switches. It’s important to keep this area neat and tidy. Don’t store older images for longer periods of time. The APIC uses this space during it’s own upgrade process and if there isn’t enough storage space it could easily fill! Cisco recommends keeping it under 75% consumed.
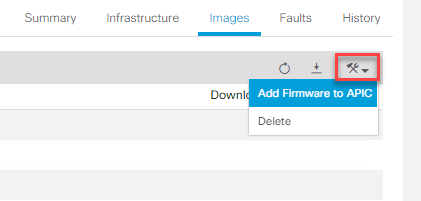
3. To upload firmware click on the hammer and wrench icon and then select Add firmware to APIC.
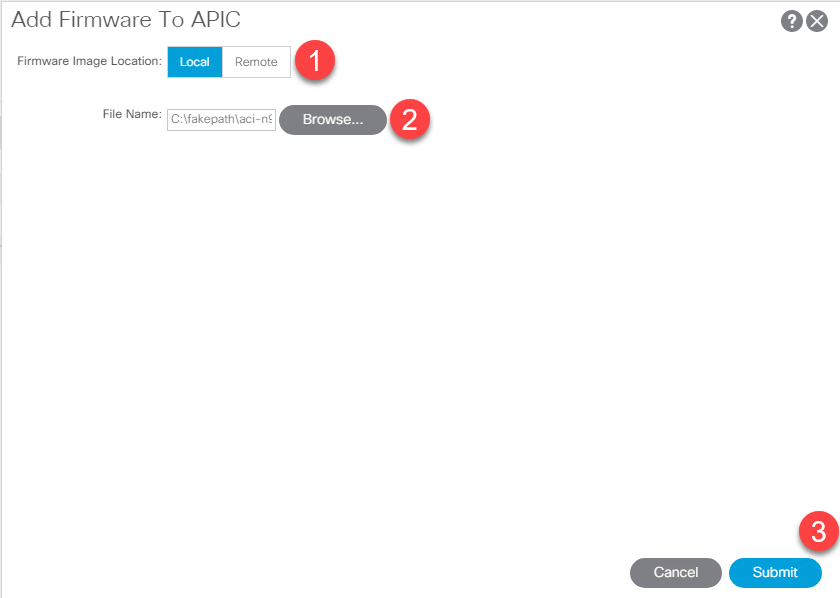
4. You can upload a local file or do a file transfer from a remote source. I’m going to upload the file locally from my PC, so I’ll leave the Firmware Image Location set to “Local” and then browse to where I saved the downloaded file. After you select your file click Submit!
Now sit back and watch the file upload. Monitor it’s progress for any issues.

You’ll notice that even after the file finishes uploading it doesn’t appear right away, or even after refreshing the screen. That’s because the APIC you uploaded the file to is now syncing the file with the other APICs in the cluster. The time it takes for the file to appear will vary on the cluster size. However, once all the APICs agree the file is in the images store it’ll automatically show up.

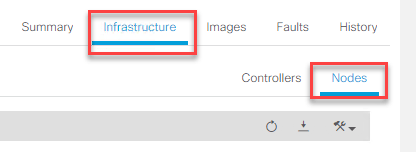
5. Now click on Infrastructure, then click on nodes.
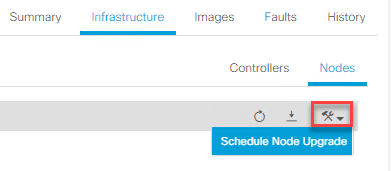
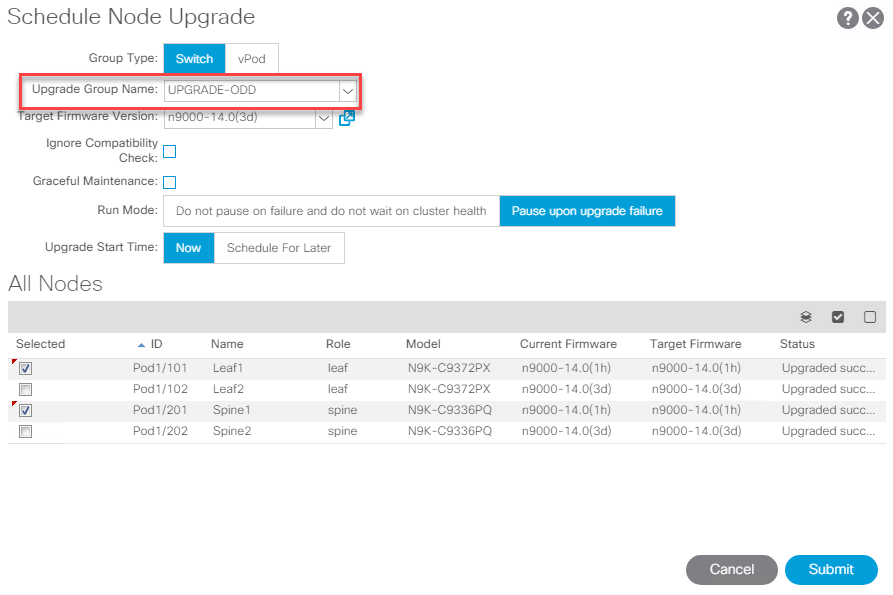
6. Again, click on the Hammer and Wrench Icon and then select Schedule Node Upgrade.
Clearly – this is a disruptive process. This will take each leaf and Spine node offline for a period of time to complete the upgrade. Don’t do this unless you’re working within your scheduled maintenance window.
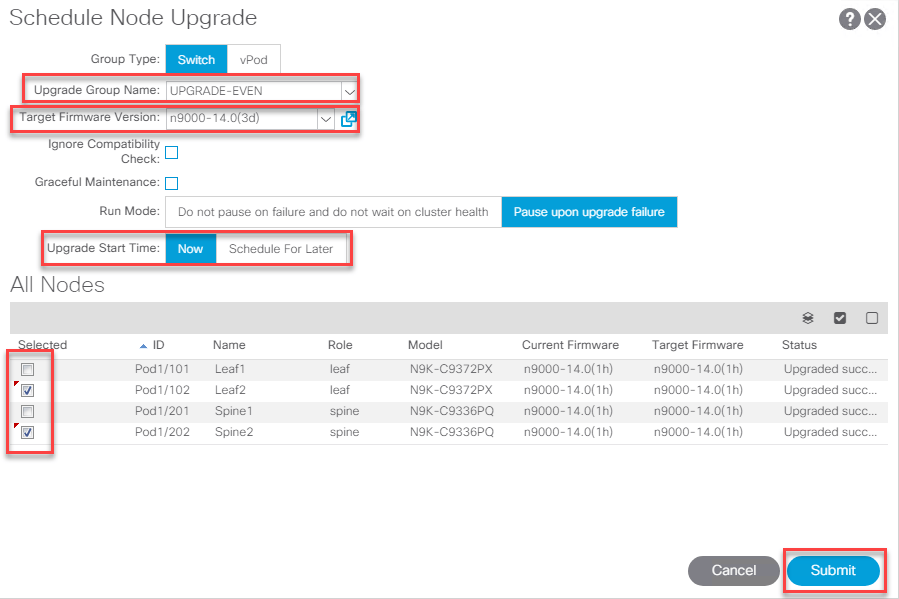
In this lab environment we’ve created two different upgrade groups called UPGRADE-ODD and UPGRADE-EVEN. However, this topology is rather small – 2 Spines and 2 Leafs. Make sure you create groups that make sense for your ACI deployment.
Creating a new Upgrade Group
If there are no existing upgrade groups you can create them from the Schedule Node Upgrade.
- Type in a group name that makes sense – like ODD, EVEN, or perhaps by node range like 1-7. Whatever works for your environment.
- Select the Target firmware version.
- Define your upgrade start time – either Now, or Schedule for later.
- Node Selection defines how you’re going to pick your nodes for upgrade. Range is typed below in the text box. You could do something like 101, 102, 103 or 101-103. Manual allows you to pick by checking the box next to the nodes you want to be included in this upgrade Group.
7. Select your upgrade group name, the targeted firmware version, and then make sure the appropriate nodes are selected. Make sure you select an appropriate upgrade start time. We’re going to do ours NOW. When you’re done click submit.
8. It may take a few minutes but after the files have been copied over and the process begins the status will be reflected in the UI. In this lab Leaf1 and Spine1 are showing their status from their previous upgrade. They have not yet been upgraded to our targeted version.

You will have to hit the refresh button to get updated status of the upgrade.
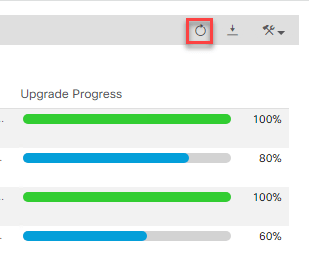
After the firmware update is complete the switch will reboot, so it will lose connectivity with the fabric and temporarily show a status of unknown.

A little while later… My Even switches have completed the upgrade. They are both showing 100% complete on the targeted version of firmware.
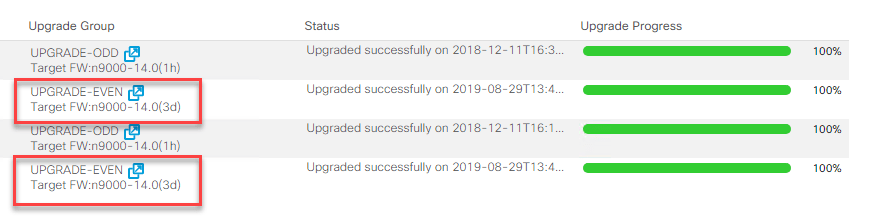
9. Now I’ll repeat the process with my UPGRADE-ODD group.

Upgrade complete!
Hopefully this step-by-step article helped you navigate upgrading the ACI code on your fabric switches. The steps may vary slightly from APIC version to APIC version, but generally speaking these should guide you well.

how long did the ACI code upgrade take?
LikeLike
I think the whole thing start to finish took less than an hour, but it was only 2 spines, 4 leaf switches, and a very minor code version jump. Your mileage may vary depending on a number of factors.
LikeLike
Thanks for the effort. Great stuff!!!
LikeLike