
How to Start your Network Automation Journey with Ansible: Part 1

In this multipart mini series I’m going to show you how to get started with Ansible!
Earlier this year I dove in on Ansible, with the help of Jason Edelman from Network to Code. As we were wrapping up a previous project where I wanted to write more about the network automation journey, Jason offered to spend some time with me and teach me Ansible, since I was a complete novice. In less than one hour we were sending configs to my lab devices! Since that day I’ve learned a ton more about Ansible and even used it to save a ton of time working with one of our customers. So, in this article I want to help get you started with Ansible, and in a future article I’ll show you how we used Ansible to crank out nearly 100 network device configs in a matter of seconds for a branch upgrade project!
Why Ansible?
Ansible is great because you don’t need to know programming or scripting. If you know how to configure a device, and a little bit of Linux, you can easily get started with Ansible. If anything, Ansible will wet your appetite for automation and make you want to learn more! You don’t need any coding experience so Ansible is a really great place to start your Network Automation Journey, in my opinion.
The Lingo
Before we jump in let’s first define a few important terms as they relate to Ansible.
ACM – Ansible Control Machine, or Control Node. This is the machine you have Ansible installed on. It could be anything from a laptop, a server, a VM, to a Raspberry Pi. Really any Unix based OS with Python on it will run Ansible. Even though Ansible runs on Python Windows machines are not supported as Control Nodes. You can have as many Control nodes as you want. However, they operate independently and even a single ACM can control hundreds or thousands of devices!
Managed Node – A device managed by an Ansible ACM.
Inventory – aka the Host file – is a list of managed nodes that can organize them into groups, even nested groups, to make referring to them easier. The inventory file can also contain variables that your playbooks can use. There are many ways to handle variables, but more on that later. The inventory file can either be a .ini file or a YAML file. Either way, syntax is key!
Modules – these are little bits of code that Ansible uses. There are specific modules depending upon the platform or specific function you’re trying to configure. I work a lot with Cisco devices specifically so I use a lot of Cisco IOS or NXOS related modules. There are modules for many other OS, not just networking either.
Task – an action usually containing instructions calling an Ansible Module.
Playbook – a collection of tasks. These are organized usually by work flows. You can have a playbook that does a basic config on a new networking device that you’re deploying, which I’ll show you later in this series.
Tools
To work efficiently with Ansible files I recommend the following tools:
Visual Studio Code – this is my go to code editor. It natively recognizes coding languages and highlights syntax for you so it’s much easier to read than say using notepad. You can also find add-ins for additional scripting languages and even a Cisco IOS Syntax add-in. Notepad++, Atom, are also really good for this.
Cyber Duck – This app lets you connect to servers, including cloud storage, and more easily manage files via secure file transfer methods. What I really like about Cyber Duck is that I can browse the files and then open them in Code, edit them, and then as soon as save them Cyber Duck uploads right back to the server! This saves you from manually moving files back and forth or having to use text editors like Nano or Vi. Thanks to Jason for showing this one to me!
Installing Ansible
As stated earlier, you don’t need a ton of compute to run Ansible, which is great. If you have something that will run Linux then you’re in business! I have a few lab servers running ESXi and vCenter and some virtual machines. If you’re using a Mac laptop or running Linux OS you can install Ansible on that. My Ansible server is running as a VM, but I’ve also installed it on a Raspberry Pi. So, please don’t feel like you need a beefy server running virtual machines to get started – you just don’t.
My Ansible ACM is running Ubuntu 20.04 LTS. With the OS freshly installed I ssh into the box to begin my setup.
First I’ll update the OS to make sure it has the latest packages:
sudo apt install update && upgradeThen, just to be sure Python 3 is installed and we’ll install PIP for Python3 as well. PIP is a package installer/manager specific for packages written in Python.
sudo apt install python3
sudo apt install python3-pip
Next we’ll install Tree. Tree is a useful little app this will display visually folder structures in the shell.
sudo apt install treeThen, we’ll install Paramiko, which is a Python module Ansible uses to connect to remote devices via SSH.
pip3 install paramikoNow let’s install Ansible:
sudo apt install software-properties-common
sudo apt-add-repository --yes --update ppa:ansible/ansible
sudo apt install ansible
Let’s break down the above commands. The first – software-properties-common let’s you more easily manage software vendors and their associated software packages. The apt-add-repository line adds Ansible software to your list of repositories. So, the next time you run sudo apt update it’ll automatically include Ansible in the upgrade. Finally the last line installs the Ansible binaries.
Setting Up Ansible
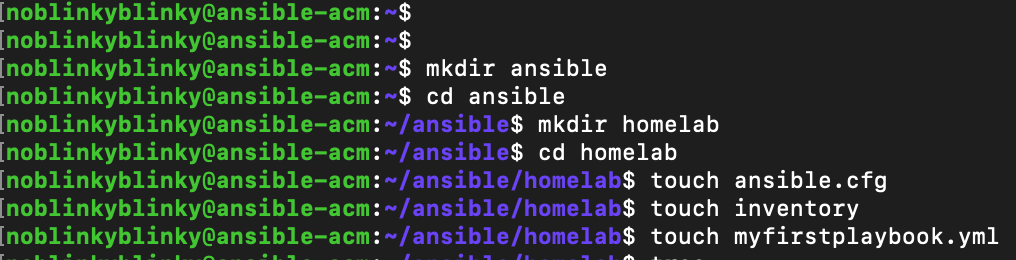
Ansible relies heavily on file and folder structures. It expects to find files of specific names in certain locations in order to function properly. Here we’ll create the base file and folder structure Ansible needs using mkdir and touch. The files will be empty, but we can use Cyber Duck to browse, open, and edit the files to our heart’s content. Then we’ll use Tree to verify what we’ve done!
First we’ll create a folder called Ansible in our home directory using the command mkdir ansible. This is probably the most important directory as you’ll work out of here exclusively. Trying to run ansible commands outside of here will just fail.
mkdir ansibleThen we can move into that folder and create some more files. Optionally, we can create a subfolder for a specific project. That allows us to have multiple inventory files and varying configurations. I like to have a folder just for my home lab. Then, I can create additional folders to try out new scenarios or other projects without impacting my home lab setup.
cd ansible
mkdir homelab
cd homelab
Next we’ll create some files to get us started. So, whether you’re in the Ansible directory or a subfolder you’ll need the following –
ansible.cfg – Ansible configuration file.
inventory – inventory file that’ll lists all of your devices. This is an ini file and doesn’t require a file extention.
myfirstplaybook.yml – Your first playbook with a set of tasks that’ll we’ll edit later. This is a YAML file.
touch ansible.cfg
touch inventory
touch myfirstplaybook.yml
Here’s a screen shot of everything we just did all at once:
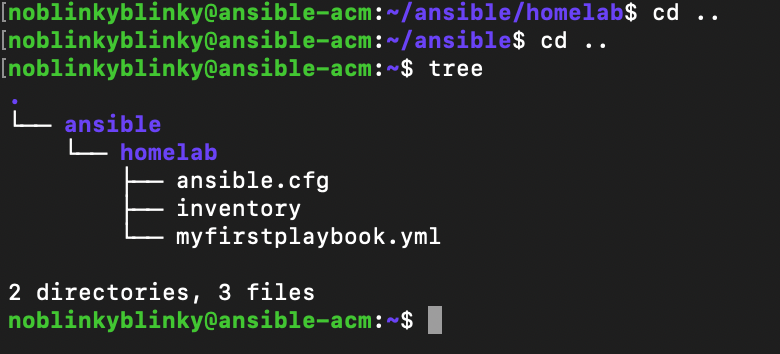
Now we can use tree to verify the file and folder structure. Navigate back to the root of your home directory and just type tree at the prompt and you should see something similar to this:
Now let’s open Cyber Duck!
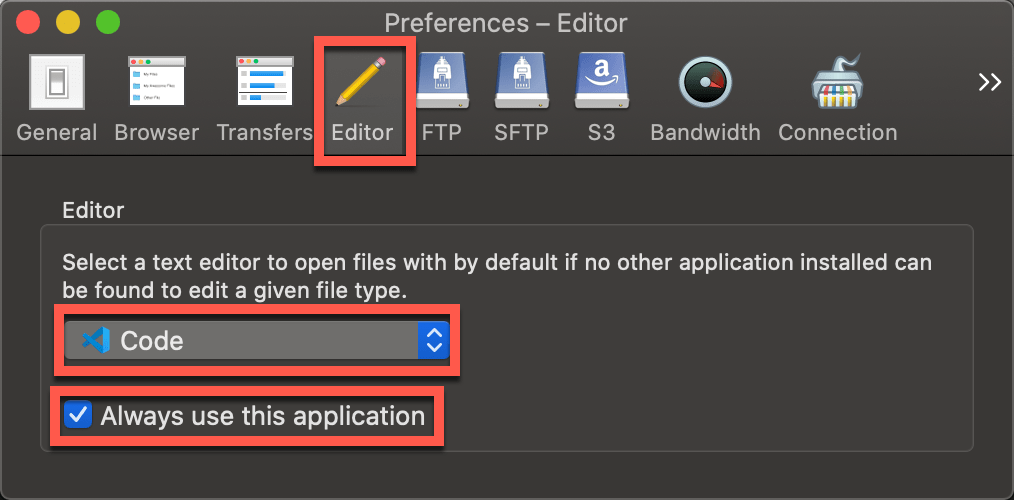
First, go to preferences and make sure that Code, or your preferred editor is set to the default editor. This allows you to open files directly from Cyber Duck directly into your editor of choice.
Now let’s connect to our Ansible ACM so we can see and edit the files with Cyber Duck. Click on Open Connection:

In the new window select SFTP from the drop down, enter in the IP Address of your Ansible server and your credentials to login to that box. Then click connect:

You’ll get a prompt for an unknown fingerprint. You can check the “Always” box and then the Allow button.

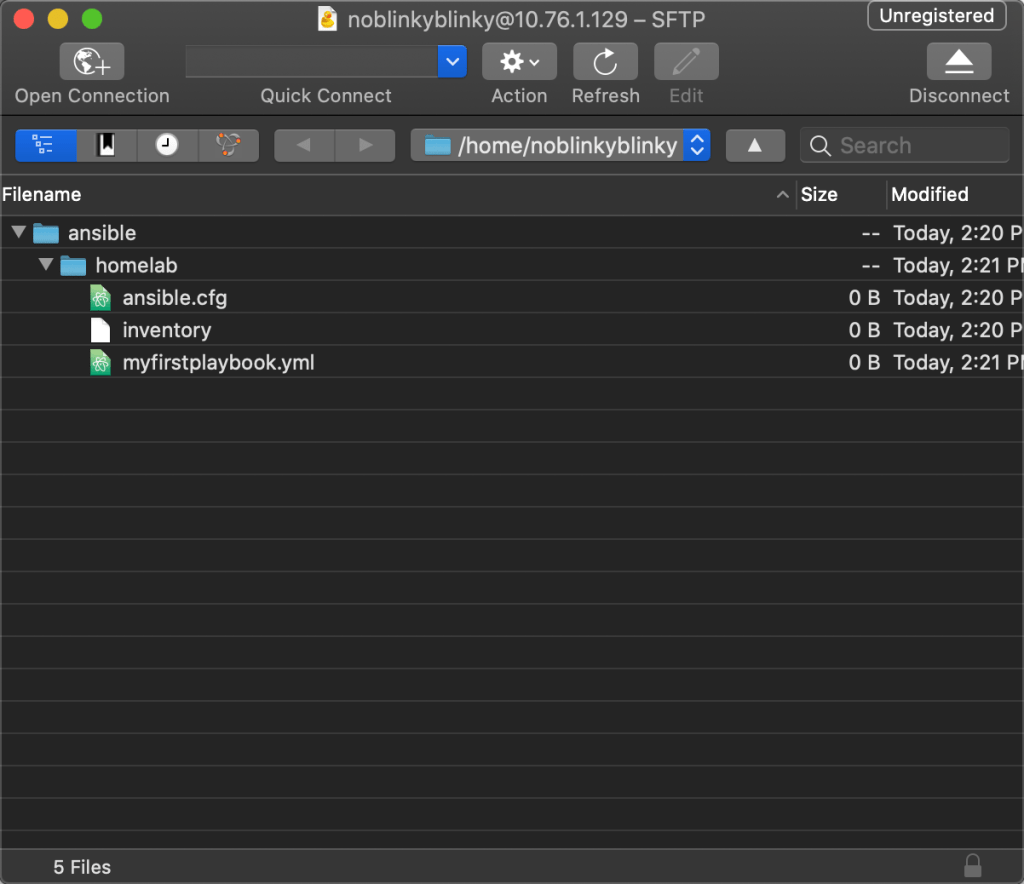
After that you should see and be able to browse the folder structure you created earlier:
Now you can click on the files to select them and then click the edit button located on the top. Your preferred editor will open and you can start editing the file. Once you save the file Cyber Duck will automatically upload the modified file back up to your server.
Congrats! You just setup your first Ansible ACM. Head on over to Part 2 of this series where we’ll edit the config and inventory files and then create and run your first Playbook!

5 thoughts